Use Microsoft Word as a research tool
The vast majority of you are already using Microsoft Word to write your dissertations. Durham’s Microsoft 365 license gives all students access to Microsoft Word for free. Word also links to many of the other Microsoft services you use everyday (Sharepoint, Outlook, Teams, OneDrive, etc…). From talking to students, it seems many are using Microsoft word solely as a word processor (for typing text), much like our ancestors did in 1990. However, it can also be used to help you organise your writing and automatically create your table of contents. Especially when combined with EndNote, MS Word can be a powerful tool to automate many time consuming tasks.

Organise your dissertation
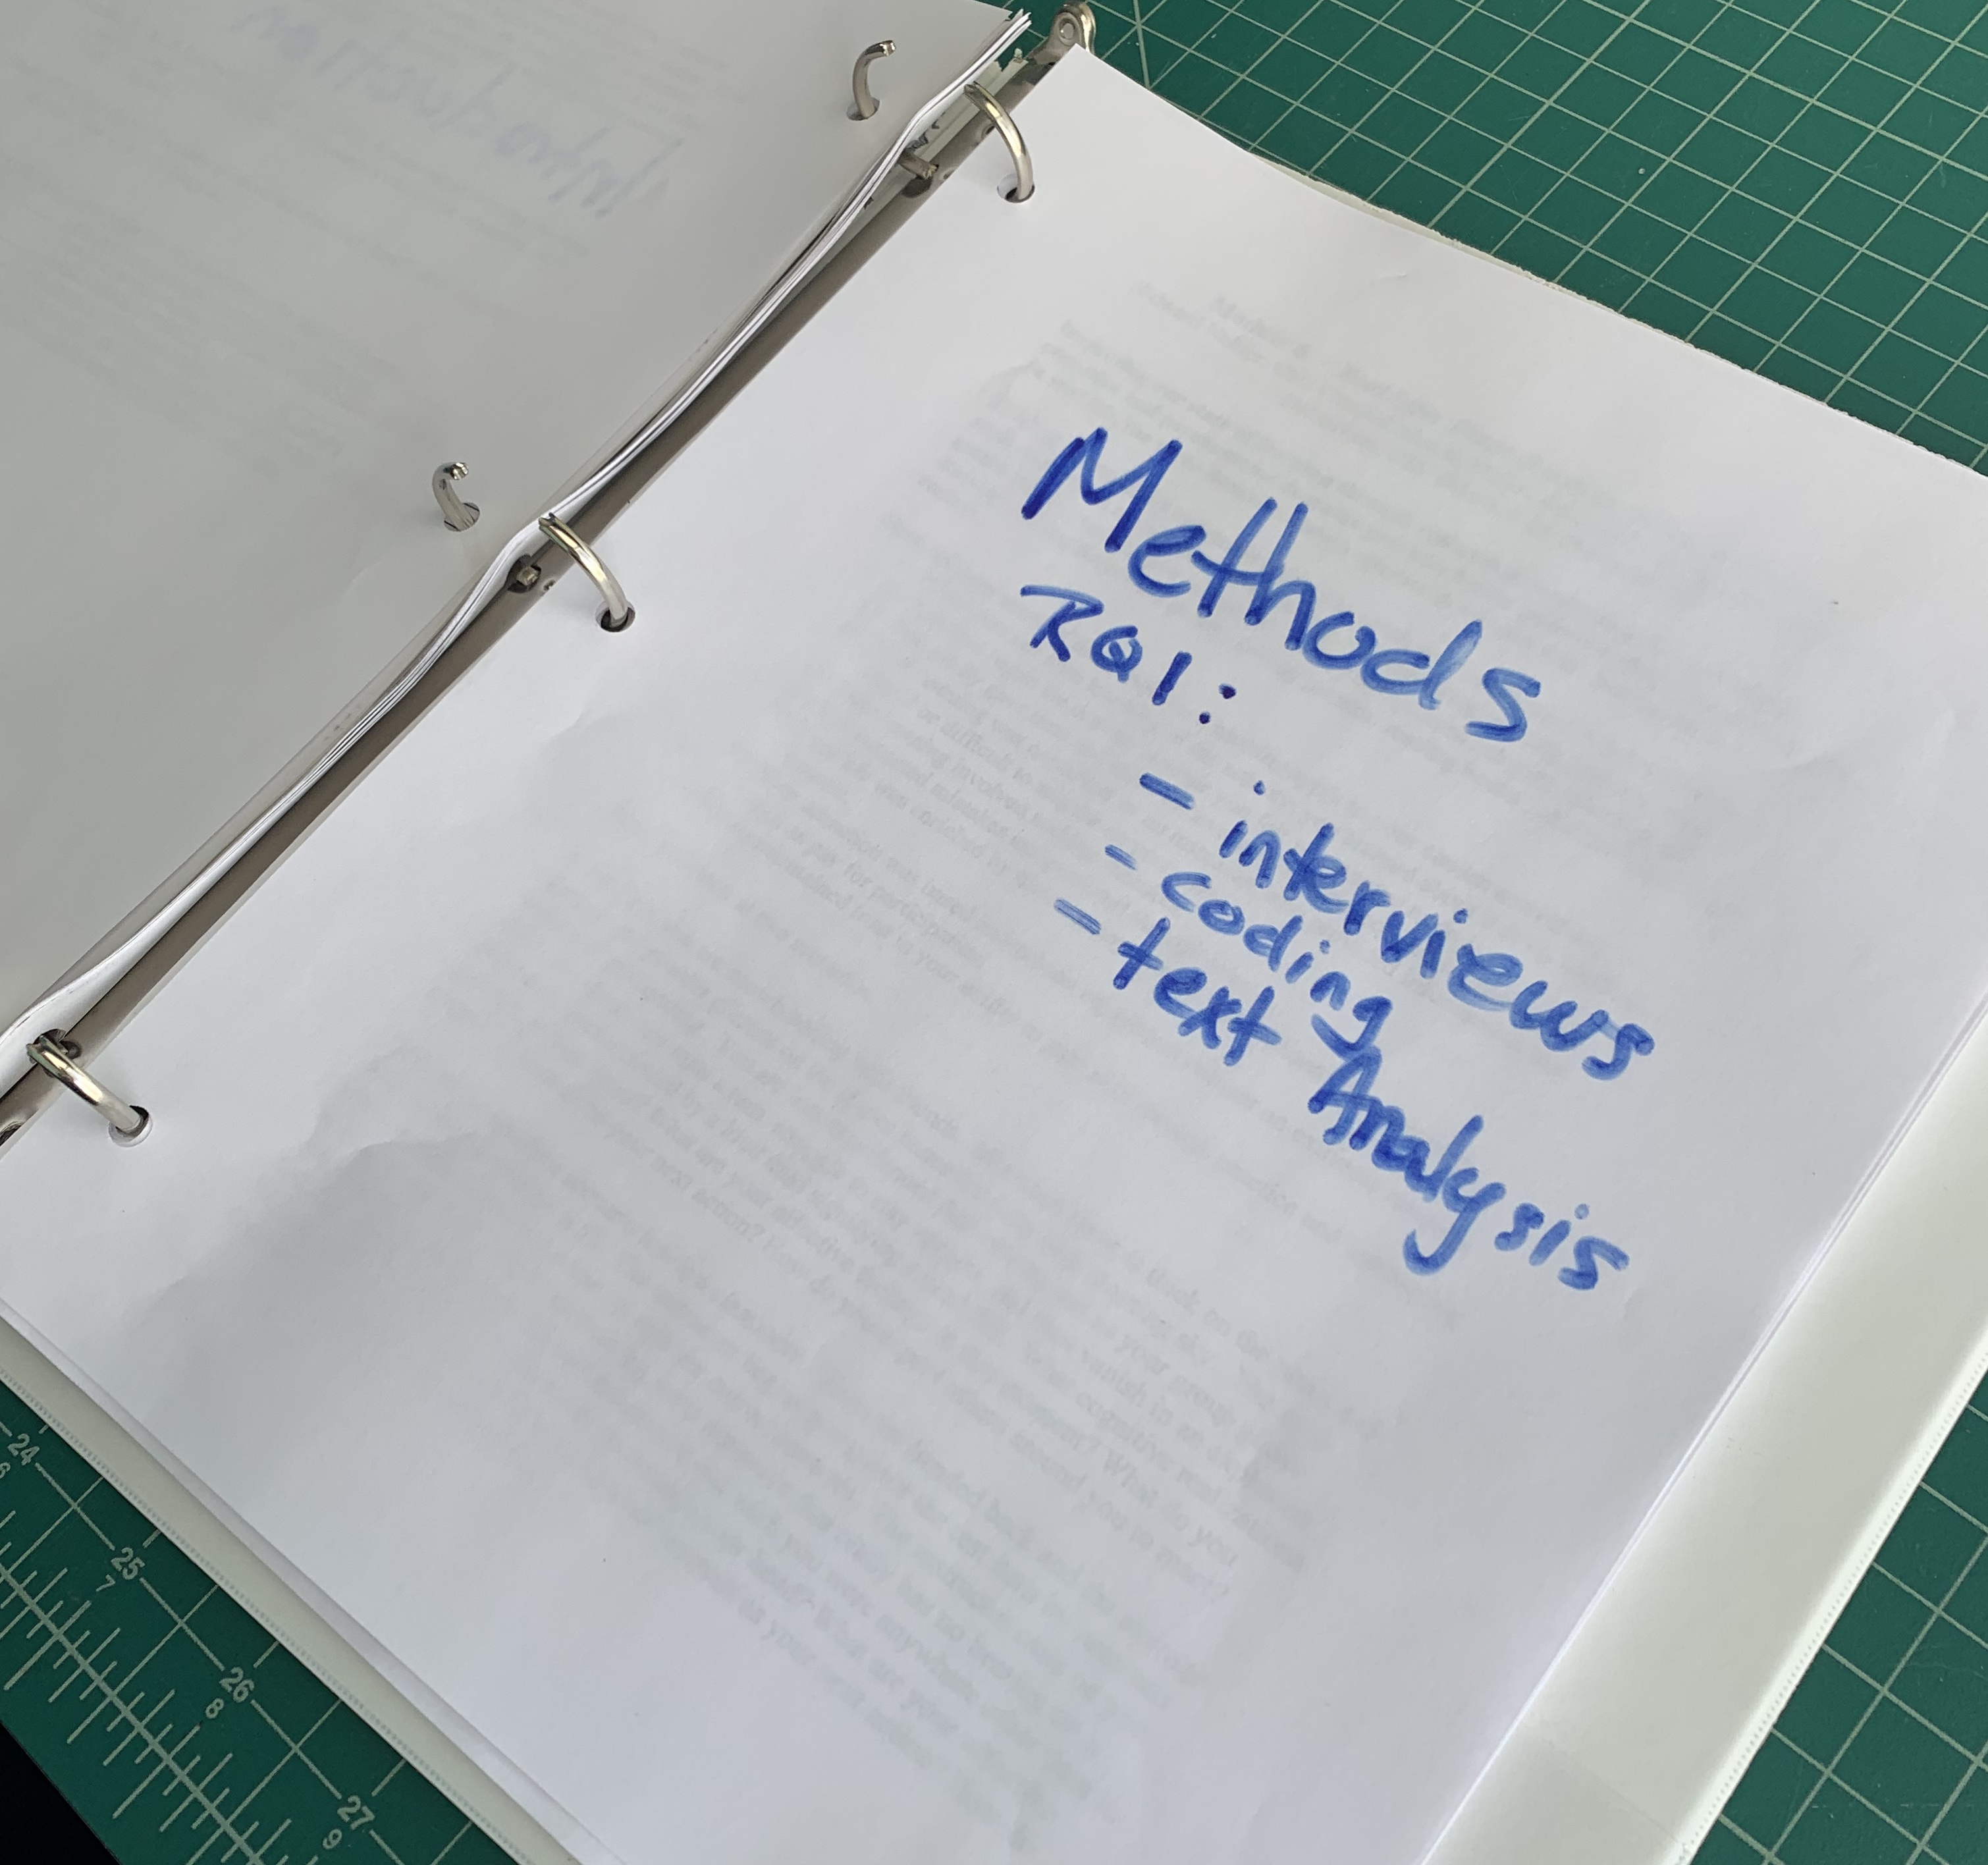
Way back (circa 2003) when I was struggling to organise my undergraduate dissertation, the brilliant Prof. Yuko Aoyama suggested I use a 3-ring binder and create a page for each section of my dissertation (each page was blank except the title of what that section would be… and any other contextual information I might have). She suggested I order each of these chapters in the binder, and as I complete each section, I replace the blank page holder with my now completed dissertation chapter. This helped break the large/daunting dissertation into several smaller and more manageable chapters. This also helped keep the dissertation organised and offered a visual representation of what I still needed to do. You can use Microsoft Word for the same function by using headings for each of your chapter titles. Then you can have MS Word turn this into the table of contents and you can have an overview of the outline of your document. See below for how to do this.
Using headings in Microsoft word
There are several reasons you should use “headings” in microsoft word: it makes documents accessible to screen readers; it makes documents prettier; it allows Word to automatically make your Table of Contents for you (and update it); and it can help you organise your chapters/ideas.
I suggest starting by making an outline of what you plan to have for chapters in your dissertation. This can be as simple as:
- Introduction
- Methods
- Results & Discussion
- Research Question 1 stated as a result
- Research Question 2 stated as a result
- Research Question 3 stated as a result
- Conclusion
- Appendices
- Bibliography
Now it is time to turn each of those chapter titles into “headings” so they will automatically follow the same style and be added to the table of contents.
There are a few different ways to do this.
If you are starting from an outline
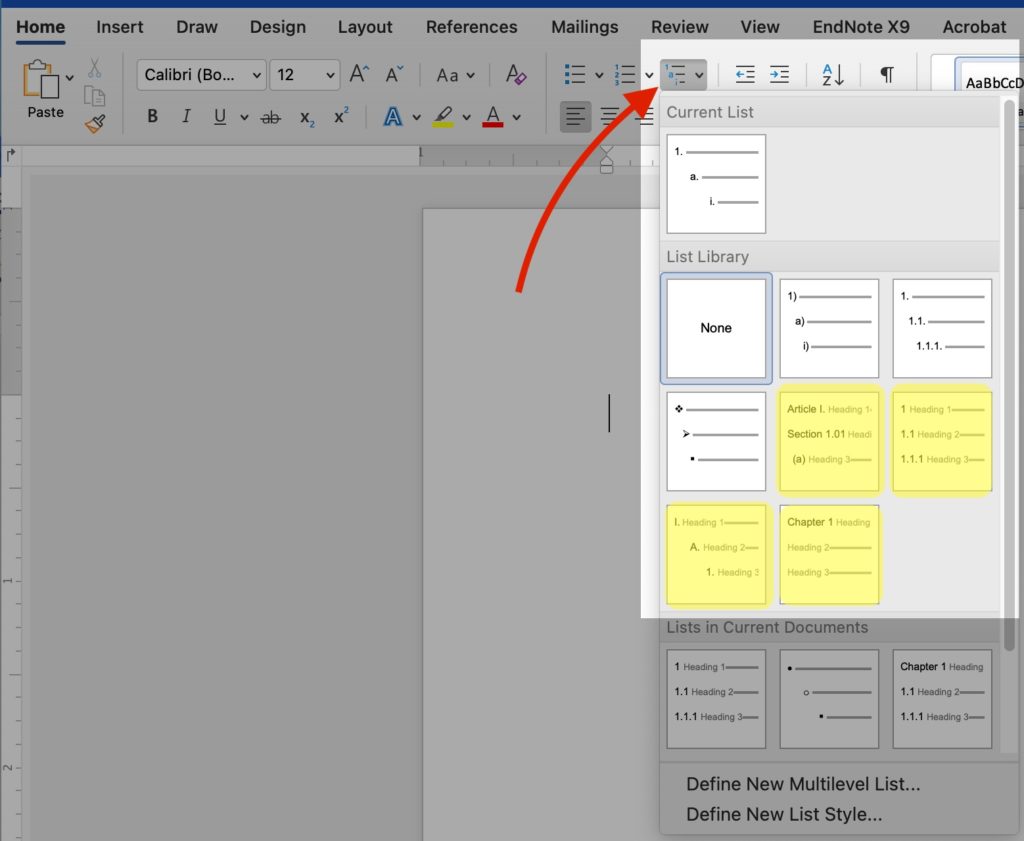
Highlight your entire outline and click on the multilevel list button (it’s in the “home” ribbon… see image below). In the corresponding drop down there are several options that have “heading” as part of the “list” (highlighted in yellow below) pick one of those.
You have now converted your outline into a nested list of headings… If you want to indent some headings (turn them into sub-headings or sub-sections of a chapter), just press the “increase indent” button (in red in the image below). You can also just use the ‘tab’ key (⇥ or ↹) on your keyboard.

Lastly, if you have new sub-headings (or even sub-sub-headings) that you want to add, you can just type them in and highlight the heading and click on the relevant style in the style ribbon.
Once you have used headings in your document, it’s very easy to add in a table of contents.
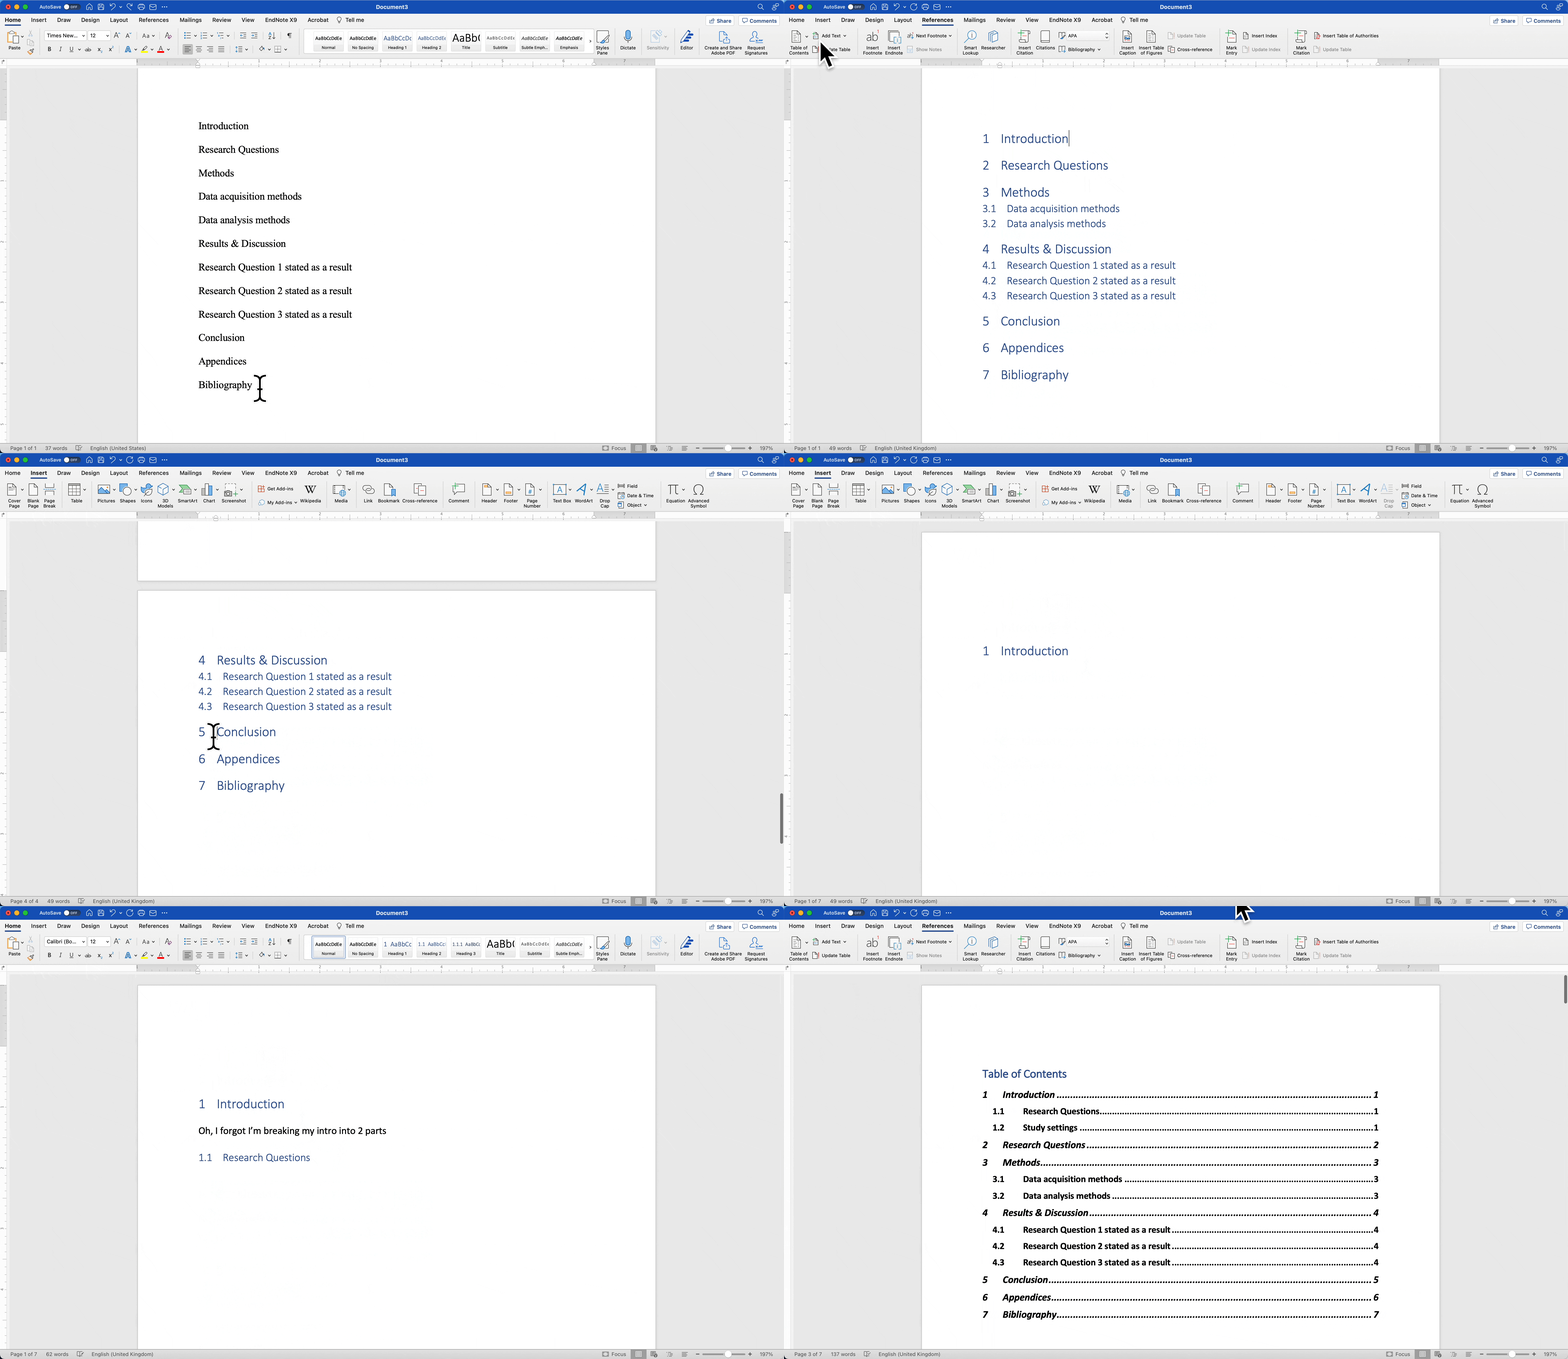
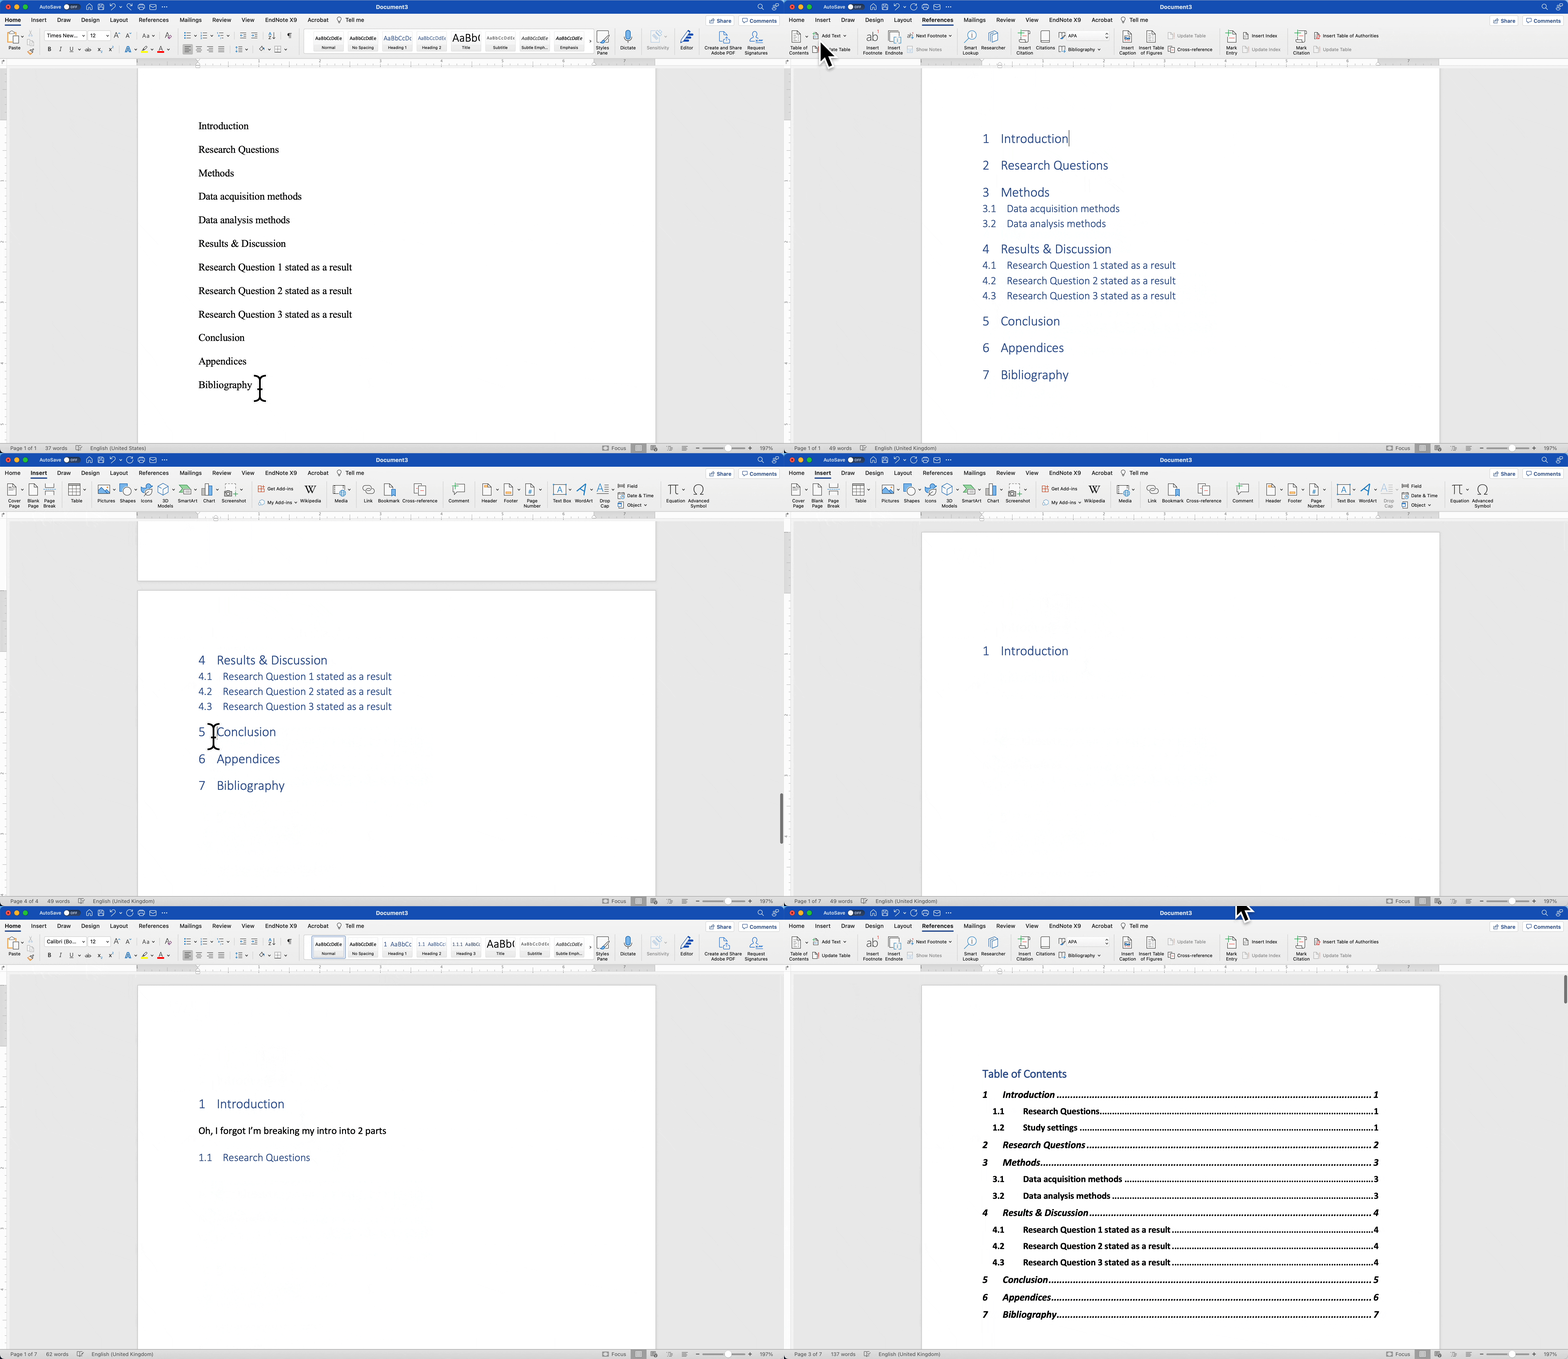
Here is that whole process (I often use the tab key to indent a sub-section):
If you are starting from a document you have already written
If you have already written a paragraphs of text in a document, you can just select the intended “headings” for each of your sections (for example, your chapter title or any sub-section title) by sand click on the appropriate ‘style’ (e.g. “heading 1” or “heading 2” …) in the ‘style ribbon.’ If you don’t see the style ribbon (with “normal” or “heading 1” as options in it), use either the button for the styles drop down or click on the button for the styles pane.

In this video (from Microsoft), Doug demonstrates that you start by selecting the text you want to use as your first heading (in this my example above it would be selecting the word “Introduction”), and then clicking on Styles.
As with the above method, once you have headings in your document, it’s super easy to add in your table of contents automatically. As you add more headings, sub-headings, sub-sub-headings, and dissertation text you can just right click on the table of contents and update the table. This puts in the correct page numbers (don’t forget that Word can also automatically add page numbers to each page).